Monday, July 02, 2012

Projects update

Hello folks! Here's the current project status on the brooch, and a new piece of text art
The goldwork is coming along very nicely and has been a lot of fun to work. there's a small section where I'll need to add another strand of gold since too much of the white background is showing near one of the craters. It's a minor fix, and shouldn't take much time at all.

And here's the text art. The text is from Jules Verne's travel to the moon. I started with the gold layer, in Roman Rustic, then a layer of Gothic Textura, on the 60 degree offset. and finally a layer of gothic back on the straight up and down. I think this piece does need a bit of white, that may go in concentric rings, not sure yet. I'll figure this out later today.

And now for today, Happy Stitching everyone!

Friday, June 29, 2012

And the internet is back...

Hi Folks! The internet has decided to cooperate, finally. (1 am Friday morning) anyhoo...
So, I'm adding in the padding for the goldwork. This is simply Pellon craft interfacing (non-fusible and non-woven) I drew my circles on it, using a template, and fine tipped marker. And then cut them out with an exacto knife. Very simple. Stitching them down with a an easy couching stitch.

Remember in the last installment, I mentioned that I'd need to stitch from the back. On the right of the circle, you can see where I had to stitch from the back to find the edge of the design. Then I simply trimmed away the excess with a pair of embroidery scissors.


And here's the piece with most of the padding attached.

The next installment will show the goldwork, it's similar to Or Nue, done with one color, over padding.

Until then, Happy Stitching!

Tuesday, June 26, 2012

Sorry about the delay in posting, there's been wonky internet here. Seems to be fixed though. Also, the weather has gotten really nice. And here we go...


Hi folks! Today's post is about starting a project. I'm beginning a new brooch/pendant, and I thought it might be interesting to see how it all comes together.

This time I'm using a hoop instead of a frame. I wanted to have a piece that felt portable, and small, rather than large and stationary (I also thought this might be a little easier on my back, which has been well agravated this weekend)

I'm showing the back since I wanted to show that indeed I do wrap my hoops, it adds a nice bit of tension and grip to the hoop. It greatly improves even the crummiest of hoops. I also replaced the thumbscrew with a longer one to accomadate the added padding, it's a simple change but it makes the hoop a lot nicer to use. I didn't wrap the outer hoop because that felt like overkill. However, this project may need it, we'll see as I go along.

I'm just using basic cotton muslin as the ground fabric. It's rugged enough, and none of it will show on the final product so I have no problem with it. It's also a wide enough weave that the technique I'm using will work well. Other projects might have a tighter weave of cotton, or wool, it depends on what I'm doing of course (and what's right at hand on the desk. Not that that's a deciding factor or anything, really.)


 I like using tissue paper (standard gift wrapping tissue, buy the cheap stuff, it works better) to transfer a detailed design. I don't have to worry about the grain of the fabric, or running of ink, or anything like that.


 I'm just using a very small backstitch to transfer the design. Sometimes I use split stitch, or a running stitch. This time I wanted the back to look as much like the front as possible, in case I needed to find the edge from the backside of the fabric. (This does happen, and on this project I'm pretty sure I'll need to do that)


I'll post the next segment as the internet permits. 
Happy Stitching!

Saturday, June 23, 2012

A finished example

This is what that whipped cord looks like when it's all worked closely together. I love the texture on this. It's very solid, almost like a heavy twill. I don't think the picture captures the texture very well, but it catches light differently by the direction you're looking at it. And I'm very happy with the turkey stitch heart.
(An alternate way of fluffing turkey stitch, is to use an eyebrow brush/comb, that's my preference, but I don't do large areas...yet)

If I can get some help with the photography, I'll post a tutorial on the technique. I *think* that it's a variation of overcast stitch but more 'whippy' if that makes sense.

Well folks, I'll see you Monday. Have a great weekend, and happy stitching.

Wednesday, June 20, 2012

Progress

Goes very slowly, but I'm at least enjoying myself. that's five hours of stitching that I've added to the necklace. I'll be doing a blitz on it tonight and tomorrow, so there should be more to see on Friday. I'm also doing sketches, and learning how to use acrylic paints (whole new medium for me, it's very interesting)

I believe that learning new skills, or revisiting old ones is a good way to keep the creative juices flowing and gives me more tools to use, to make my pieces. Sometime I'll write more on that. As for now, here's today's picture, and I'll see you all on Friday.
Happy Stitching!

Monday, June 18, 2012

I'm back!

Hi Folks, I'm, once again, attempting to post more regularly. So, unless it's raining (I carry my computer to the studio) I'll be posting on Monday, Wed, and Fri. If it's raining, there might be a quickie posting via the cell-phone-thingie.

So here's one of the projects that I'm working on... (click to enbiggen)
Once again, I'm trying to work on a necklace, this time it's going a lot smoother.
The technique I'm doing is wrapped cord. I'm using basic no.10 crochet cotton, wrapped with two strands of  Sulky rayon thread. I take two whips around the cord, plunge the needle and then back up, to take two more wraps, and then just keep going.
 I like to keep the cord on a needle to make it easier to plunge behind the embroidery.
The numbers in the circles are the order of work. It should make more sense when there's more done. Okay then folks, I'll see you in a couple days.

Happy stitching!

Monday, December 12, 2011

Rhapsody in blue I

Hello folks!
I've started a new brooch, that'll be part of a series. I like working in series, as it lets me explore a number of ideas within a set of constraints.
In this one, I'm playing with the color blue, texture, and layers.
Happy stitching to everyone!


Wednesday, December 07, 2011

It's beginning to look a lot like (insert appropriate winter holiday of your choice, here)

I'm having fun stitching up christmas ornaments. This one is on wool and worked, mostly, with silk sewing thread (Gütermann). The outlining is rayon (Sulky) wrapped string (ball I've had laying around for 20 years). And the pattern is by Sharon B. at PinTangle
Happy stitching, everyone!

Sunday, November 13, 2011

Long time no post...

Pardon the cell phone quality, but here is the current project.

I'd been having troubles with earlier projects. They were pretty enough, but they didn't feel like my work. They were unfocussed. So, I went back to basics. I limited this to 2 stitches: split stitch, and satin stitch (and its variations). I also limited the pallette to 2 colors, 1 accent, 1 neutral, and 1 metal (blue & green, orange, white, and gold).

Using limits does help my creativity, and I'm very happy with how this is coming along.


Sunday, March 06, 2011

Current project

Here's an update on the current project. The outer petals, and leaves are done.

Tonight I'll be setting up for the inner petals. I'll be working those over wire, using detached buttonhole, and gold thread.

Have fun, and I'll post again tomorrow.


Monday, February 28, 2011

Testing if this works...

Hi folks! I know it's been a long time since I last posted. I'm hoping to be better at it starting, this month.

The picture is of the latest, finished, embroidery.


Wednesday, February 24, 2010

Going Dotty

I'm having a ball with these little things. here's another one. 

 
Here's the front.My tribute to the Matrix.... Dot Matrix.

 
And the back...

 
And the whole happy set!

Saturday, February 20, 2010

Recycling!

I've been enjoying myself with some basic notebook making.
 
I know it doesn't look like a notebook. In fact, it *is* an old cigarette pack that I sanded, gessoed, painted and varnished. I'm happy with how it turned out. 

Except...the case looked a little full...

*Blargleblelble!*

See, there they go, all better now.

Tuesday, February 02, 2010

What I've been working on.

 This is the current art project, it's about 18 inches by 30 inches. I'm working on paper that I've treated heavily with gesso. The first layer of text is done with graphite (a no-wood pencil) then I hit it up with matte medium to give it a look similar to ivory and the white layer of text is gesso because I love the effect it has in the light.
 Here's a closeup, if you're curious. Oh the text is the Psalms, in Latin.
 
 I'm also working on a bead-embroidered bracelet. 


As always, click on the pictures for enlargements.

Sunday, January 31, 2010


Time to restart the blog. expect more updates.
Posted by Picasa

Sunday, April 05, 2009


Here's the latest finished project, it only took 60 hours, which is a lot faster than usual.

The white material is glow in the dark embroidery floss, and sewing thread. I'm still trying to photograph that well, so it's visible. (I think it has something to do with exposure settings, but I'm not that good at this stuff)

Wednesday, March 25, 2009

Okay, here's more of my trying to blog more regularly.
This is the most recent finished project. I'll have pictures of the next one in a few days.

This one is worked over wire, like the last one. The stitches are buttonhole, chain, french knots and woven picots around the center.

The back is worked in detached buttonhole with stem stitch worked on top. Also the base is edged in detached buttonhole. My next one will be more finished looking, if I can figure it out.
And the back of the small petals was a lot of fun to work. I picked up some of the gold silk twist, that they're using on the Plimoth Plantation project. And added some delicas to make the little flowers.

Until next time...Happy creating!

Friday, March 20, 2009

Long time no post....
"Let me 'splain... No, there's too much. Let me sum up."

The reason for the break in posts, from last year, is that we moved. I no longer have the craft area that I had at the old apartment. But I'm still crafting. It's been an interesting year, and I'm now able to get out, and have been going to the local library (it's a 5 minute walk) to work on my embroidery.

This is some of what I've been working on...


This is worked in buttonhole stitch, detached buttonhole, woven picots, french knots, couching, lots of split stitch, and seed stitch.

Here's a close up of the split stitch petals and pearls.


You can also see the medium sized petals, that I worked in couching and seed stitch. I wanted to thank Mary Corbet for reminding me about seed stitch. It's a useful filling stitch.

Here's the back...


yup, all the backs are worked in detached buttonhole. I think it makes for a better look when the backs are embroidered as well as the fronts.

I'll be posting more frequently now that I've been able to get the pictures uploaded from my camera.

Happy crafting, you all.

Monday, May 12, 2008


Moving the desk to the front was a good idea. I'm able to fit a rug (just picked it up Saturday at IKEA) and the round worktable back there. It's starting to look a lot better. The unfinished state of the walls and floor is an annoyance, but I can live with it.

I like the flow of the space better now too. I think it'll be much more functional once it's finished.


This is the jewelry storage, it took almost a week of sorting to get it all together. Now I've got a much better idea of what I have and what I can work with. It's a marvelous thing.

More to do,
Happy crafting to you all.

Sunday, May 04, 2008


I've moved the desk to the front of the room. I think that'll work better, and maybe improve the wireless internet connection out there. (not so many walls, pipes, and stuff)


And moving the desk has given me a dance floor in the rest of the room. It's a good space for a table and chairs, and laying out sewing.


I've still got to work on the above-shelf storage. I'm not entirely sure how to set it up, but I'll get it figured out.


And that is a finished organized shelf. I'm absolutely thrilled with the results. If all goes well, I'll have this finished in a few more days.

Happy crafting to you all!

Friday, May 02, 2008

Organization, part two....and an experiment.

First, the experiment. I don't know why my pictures format the way they do, and that I can't get them in line with the text. Hopefully I'll figure it out in this post
edited to add: It's figured out! Woot! (and I figured out, more or less, how to fix the previous post

On to the organization


This is the "Clean Sweep" staging area for sorting stuff, it's not bad, it's in the garage and is a good way to lay everything out to actually see what's cluttering things up. I'm still trying to figure out a storage solution for the various bags I have, but that'll come. And I'm still trying to determine if I'll make baskets again, or if I should find a new home for the reeds. (So far I'm coming down on the side of yes, I will make baskets again)


And another picture of the staging area.

More will come as more is done.

Fear me, I'm violating a law of thermodynamics by reducing disorder! Woot!

Thursday, May 01, 2008


Here are the before pictures of the craft space. The first picture is of the main bookcases and storage in there. I've let it get entirely too cluttered and hard to find things, this winter. The craft space is relatively unheated so it's hard to work in there.


The second picture is towards the desk area. I didn't take a picture of the table in front of it, since there wasn't room to stand. (Yes, this is a problem.) Those cabinets at the window have never been as useful as I thought they'd be. They're too tall to work on sewing, or calligraphy. And too short to work standing up. and the storage in the cabinets is too narrow to hold my sewing machine and serger. They seemed like a good idea at the time. But, they'll get a good home at my brother's place.


The third picture is just to the left of the desk, and would be the spot I'd set up a table to do calligraphy. A casual glance will give you the impression that it's slightly cluttered. A closer examination, however, will reveal the truth...it's very cluttered.


The fourth picture is of the desktop itself (minus the computer which is currently in the living room, until it warms up out there some more)

Tuesday, April 29, 2008

Organization.....or the woes of a long winter.

It has finally happened, I couldn't stand my craft space any longer. I couldn't find my tailors' awl, my large format bristol paper...or the floor.

Coming up will be pictures of the mostly before state (I took the pictures after already clearing it out a bit, so I'd have somewhere to stand. I'll also post pictures of the reorganization.

I'm already about half done so these aren't exactly "In progress" pics, they're more "This was the progress" pics. And I'm reorganizing the way I set it up for work.

Now if only I could get my computer to hook up to the internet in there, we'd be golden. (It's a problem with the wireless thingie, I'll figure it out eventually)

Tuesday, April 15, 2008


An update on the new rug...and it's an experiment with using my camera and trying to figure out GIMP to modify images. (so far, trying to fiddle with 'level's' and 'histogram' have been an utter bust)

If the sun is out tomorrow, I've got some jewelry to photograph.

For those that are interested, punch hooking is a marvelous way to make one of a kind rugs, and use up those yarn scraps that seem to accumulate everywhere. I use basic acrylic knitting yarns for this one. I think it's easier to run through the washer and dryer, there's no danger of felting with acrylic. It does pill a little, but a beard or sweater trimmer takes care of that nicely.

The technique is simple enough once you've done a few. Depending on your backing it can be really fast, or just fairly fast. I've done rugs on burlap, and that moves very quickly, but I find that burlap just isn't as rugged as I'd like, and can tear out before it's finished. So, this one is on cotton monks cloth. It's rugged, holds the yarn loops nicely, but it can be rough on the wrists and takes a bit longer.

If you're interested in it for yourself, Halcyon Yarns has the tools and supplies. I use the Oxford Plain punch needle for my work.

Have fun with whatever you're creating today.

Monday, April 14, 2008

I've finally got the banner and front page of my shop at Etsy set up! Woot!

In other news, I'm getting the camera figured out. Still nothing worth posting, but that'll change once I figure out the timer option thingie (I don't do well taking pictures when I have to press the button, my hand still tremors too much)

Also, the kitchen is clean, the living room is tidier, and the rug is coming along. It finally looks like something I'd admit to making. (I took out the vibrant lime green and replaced it with red. This doesn't make any sense, I know, but when I have a picture you'll understand ...I think)

If all goes well, I'll have a large batch of earrings listed on Etsy this week, and maybe an ACEO or two (calligraphy from Genesis, Chapter 1)

I still need to work on my profile there, but I'll get it figured out.
Hope your day has been good.

Sunday, March 30, 2008


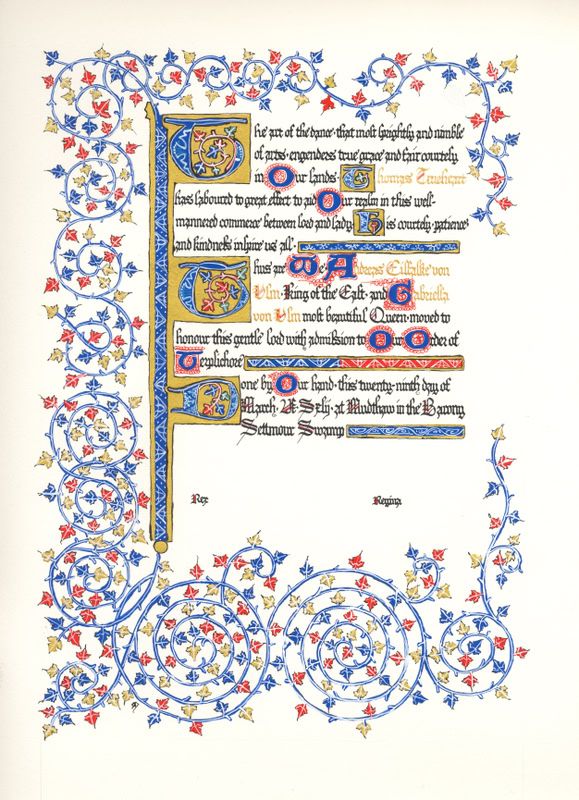
Here's that scroll that I was mentioning.

And I got the computer working...YAY!

And (again) I did get the rug started, I'm calling this one stained glass flowers. I should have pictures next week or so, and I'll have it posted on Etsy as well.

Monday, March 24, 2008

Here are some useful documents for any craftsman or artist, from the Society of North American Goldsmiths (wonderful folks!)
http://www.snagmetalsmith.org/Publications/Professional_Guidelines/
it's a collection of pdf's and well worth browsing.

Notes for today:
  • finish the scroll for the East Kingdom (a Terpsichore, picture to be posted after Saturday)
  • laundry
  • try to fix desktop computer so I can get the scanner working again.
today should be a productive craft day. If I still have the energy, I'll strip the rug frame and stretch a new rug backing.

Friday, March 21, 2008

YAY!! I finally got this damned thing to work again! WooHOOO!

Friday, July 30, 2004

It's been a while since I've updated. So here we go.....

Projects that I'm currently working on: A luxurious velvet pieced throw with embroidered vines and flowers over it. The current colors are Red, Purple, Moss Green and a buttery brown color. It's more than a little decadent, and I love it :) I'm thinking instead of standard tufting, I'll over stuff it, and use buttons for the tie downs, of course covering the buttons with more velvet, and possibly embroidering them.

I really should write a little essay on the care and feeding of demanding muses. Mine just won't let me alone. I've also been working on a silk/linen pouch, in German counted satin stitch and it's coming along, though slowly. Also a fast embroidery piece, on cheap printed cotton, with DMC (love that green color they came out with this year). Oh, and a tunic collar, and a pair or three of viking pants, and let's not forget the doublet....sigh, I hate the muse, she's so demanding.

Wednesday, July 14, 2004

Just a quick update...I'll be teaching a beginner's embroidery class this coming weekend and I've almost finished the kits for it. Most people, don't fill a canvas tote with needles, pincushions, scissors, embroidery hoops, floss and fabric for their students. That's what I'm doing. These folks will be well supplied.
Blogger Help Topic Advanced Use